
How to Celebrate July 4th in Style with Iron-on Patches
Independence Day is more than just fireworks and barbecues, it’s a time to show off your patriotic spirit from head to toe. And while store-bought Fourth of July outfits are everywhere, they rarely reflect your style. The good news? You don’t need to know how to sew or spend a fortune on red, white, and blue gear to stand out.
Whether you're heading to a family cookout, a local parade, or watching fireworks with friends, you can create a festive look that's 100% your own, using only few patriotic iron-on patches and some everyday clothes.
In this guide, I’ll show you how to transform t-shirts, denim, tote bags, and even hats into one-of-a-kind July 4th outfits, no sewing required. With just an iron and a little creativity, you'll be able to repurpose what you already own into a DIY look that screams stars, stripes, and freedom.
By the end of this post, you’ll know:
- Why embroidered iron-on patches are the easiest (and coolest) way to customize clothing
- What types of clothing work best for iron-on patch DIY projects
- How to apply patches properly so they last all summer long
- Plus, I’ll share a few bold and fun outfit ideas you can start crafting today
Let’s get started and turn your plain clothes into something truly patriotic, without threading a single needle.
Why Patriotic Iron-On Patches Are a DIY Game Changer
If you’ve never worked with iron-on patches before, you're in for a treat. These little fabric powerhouses can instantly upgrade your outfit from basic to bold, no sewing machine, needle, or craft store experience required. Here’s why patriotic iron-on patches are a must-have for your DIY Fourth of July wardrobe:
1. No Sewing Required
Forget fussy stitches or complicated patterns. All you need is an iron, a flat surface, and a few minutes. That makes iron-on patches perfect for beginners, busy parents, or anyone who wants quick results.
2. Budget-Friendly & Reusable
Instead of buying a whole new outfit for Independence Day, just grab a few embroidered patriotic patches and customize what’s already in your closet. You can even peel them off later and reuse them on bags, hats, or jackets.
3. Tons of Patriotic Designs to Choose From
From American flags and stars to bald eagles, fireworks, and red-white-and-blue hearts, there’s a patch for every style. Whether you’re going for bold and flashy or subtle and sweet, there’s something that fits your vibe.
4. Durable & Washable
High-quality embroidered iron-on patches are made to last. When applied properly, they’ll stay put through multiple washes and summer adventures.
5. Eco-Friendly & Upcycling Friendly
Got an old t-shirt or denim jacket sitting in your closet? Iron-on patches are the perfect way to upcycle clothes you already own, giving them new life.
The Materials You’ll Need for Your DIY July 4th Patched Outfit
Before you fire up the iron and start planning your Independence Day look, here’s a checklist of everything you’ll need to create your DIY patriotic outfit.
1. Patriotic Iron-On Patches
Look for high-quality embroidered iron-on patches with strong adhesive backing. Popular patriotic themes include:
- American flags (classic or vintage styles)
- Stars and stripes
- Bald eagles
- Fireworks
- “USA” lettering or slogans like “Land of the Free”
2. Clothing to Customize
You can apply patches to a wide variety of clothing and accessories, as long as they can handle heat. Here are great options to start with:
- White or navy t-shirts
- Denim jackets or vests
- Jean shorts, skirts, or pants
- Canvas tote bags
- Baseball caps or bucket hats
- Baby onesies or kids’ tees
3. Iron
A household iron works perfectly fine for this kind of project. If you have a heat press, even better, it gives more even heat and pressure.
Tip: Avoid steam settings, you want dry heat only.
4. Parchment Paper or Pressing Cloth
Always place a layer between your iron and the patch to protect both the patch and your iron. A plain cotton cloth or parchment paper works best.
5. A Hard, Heat-Safe Surface
Skip the ironing board if it’s too soft. Instead, lay your fabric on a firm, flat surface like a table or a heat-safe counter, with a towel underneath to absorb pressure.
Optional but helpful:
- Fabric glue (for extra hold on edges)
- Lint roller (prep the fabric for a better bond)
- Measuring tape (for perfect patch placement)
Best Clothing Items to Customize for July 4th
One of the best things about using iron-on patriotic patches is how versatile they are. You can use them to transform almost any fabric item into something festive and fun, as long as it can handle heat.
Below are the top clothing and accessory options to personalize for the Fourth of July (great for adults, kids, and even babies!):
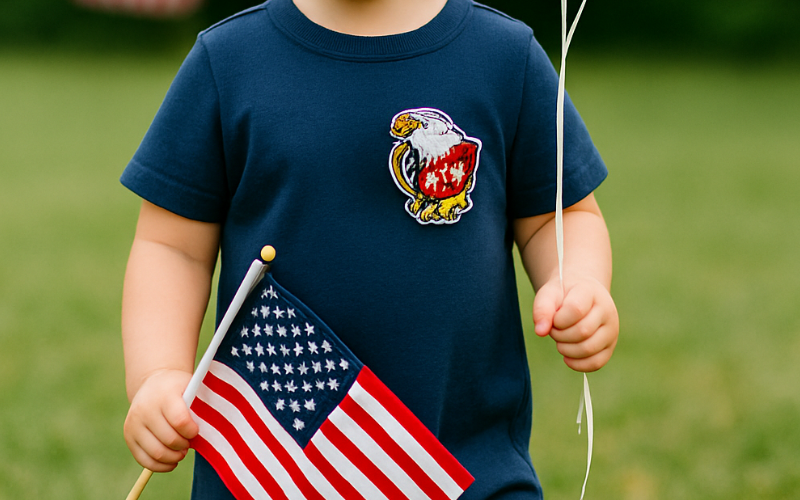
1. T-Shirts
A plain white or navy-blue t-shirt is the perfect blank canvas. Add a flag patch to the chest, a row of stars across the shoulders, or fireworks on the back.
Style Tip: Use different patch sizes to create a collage look, or keep it minimal with a single embroidered patch over the heart.

2. Denim Jackets and Vests
Denim is durable, stylish, and patch-friendly. Add bold patches across the back, a small flag on the sleeve, or scattered stars on the shoulders.
This is a great option if you want a reusable piece for future patriotic holidays like Memorial Day or Veterans Day.

3. Shorts, Skirts & Jeans
Upcycle old denim shorts or jeans by placing iron-on patches:
- On the front pockets
- At the hip or back pocket
- Along the hemline
Tip: Use a combo of red, white, and blue stars for a gradient fireworks effect.

4. Tote Bags & Accessories
Don’t stop at clothing, canvas tote bags and crossbody pouches are perfect for adding flair. You can match them to your outfit or create a stand-alone statement piece. These also make great DIY gifts or party favors if you're hosting a July 4th gathering.

5. Hats & Headwear
Add a patch to a baseball cap or bucket hat for a subtle but spirited look. Stick to smaller patches (like stars or USA lettering) for balance.

6. Kids’ Outfits & Baby Onesies
Get the whole family involved! Iron-on patches are safe for kids’ clothing when applied correctly. Add a small flag or star to a baby onesie, toddler tee, or shorts.
How to Apply Iron-On Patches the Right Way
Applying iron-on patches might sound tricky, but with a few simple steps, you can get professional-looking results that last all summer. Whether you’re customizing a tee or a denim jacket, here’s how to do it right!
Step 1: Prep Your Fabric
Wash and dry the clothing item first to remove any sizing or chemicals that might affect adhesion. Make sure the fabric is completely dry and wrinkle-free before starting.
Step 2: Position Your Patch
Lay your clothing flat on a hard, heat-safe surface. Place the patch exactly where you want it. Use a ruler or measuring tape for precise placement if you like.
Step 3: Cover with Parchment Paper or Pressing Cloth
Place a piece of parchment paper or a thin cotton cloth over the patch. This protects the patch and your iron from direct heat.
Step 4: Apply Heat
Set your iron to the cotton setting (no steam). Press down firmly on the patch for 15-30 seconds, applying even pressure. Don’t move the iron around, hold it steady.
Step 5: Let It Cool and Check
Allow the patch to cool for a minute, then gently test the edges. If any part lifts, repeat the heating process, focusing on the loose edges.
Step 6 (Optional): Reinforce with Fabric Glue
For extra durability, especially on frequently washed items like kids’ clothes or denim, apply a thin layer of fabric glue around the edges after ironing.
Tips:
- Avoid steam or water during application, patches bond best with dry heat.
- Wash patched clothes inside out on gentle cycles to prolong adhesion.
- Use a pressing cloth every time you iron the patch in the future.

Outfit Ideas Using Patriotic Patches
Ready to turn your DIY patch project into a head-turning July 4th look? These outfit ideas will help you get creative with embroidered iron-on patches!
Look 1: Classic & Clean — White Tee + Flag Patch Over the Heart
Start simple with a crisp white t-shirt and place a medium-sized American flag patch right over your heart. Add a red or navy bandana for an easy, timeless vibe that’s perfect for any 4th of July event.
Look 2: Kid-Approved — Cute Romper with an Eagle Patch
Add a bold eagle patch to a plain toddler romper or kids’ tee. Pair with denim shorts and sneakers for a comfortable, patriotic playdate-ready outfit.
Look 3: Bold Statement — Denim Vest Covered in Stars & Fireworks
Upcycle an old denim vest by covering the back with star patches and firework designs. This look screams Americana and is perfect for standing out at parades or fireworks shows.
Look 4: Subtle & Stylish — Patch Pocket Jeans
Add small star or flag patches to the front or back pockets of your jeans for a subtle pop of patriotic flair that works for everyday wear before and after the holiday.
Look 5: Coordinated Accessories — Hat + Tote Bag Combo
Pair a navy baseball cap featuring a “USA” patch with a canvas tote bag decorated with red, white, and blue stars. This is a great way to coordinate your accessories without going overboard.
Care Tips to Make Your Patriotic Patches Last
You’ve nailed your DIY Fourth of July outfit with vibrant embroidered iron-on patches, now it’s time to keep them looking fresh and festive for many celebrations to come! Proper care can extend the life of your patches and keep colors bright.
1. Wash Clothes Inside Out
Turn patched garments inside out before washing to reduce abrasion and protect the patch edges.
2. Use Cold Water and Gentle Cycle
Hot water and aggressive washing cycles can weaken the adhesive and fade embroidery. Stick to cold water and gentle or delicate wash settings.
3. Avoid Bleach and Harsh Detergents
Bleach can damage both fabric and patch threads. Use mild detergents formulated for colored clothing.
4. Air Dry or Low Heat Only
Heat from dryers can loosen the adhesive. Whenever possible, air dry your patched items or use the lowest heat setting on your dryer.
5. Iron With Care
When ironing patched areas, always place a pressing cloth or parchment paper over the patch and use a low to medium heat setting. Avoid steam.
6. Reinforce Edges if Needed
If you notice edges peeling, you can carefully reapply heat with an iron, or use a small amount of fabric glue for extra security.
Conclusion: Celebrate in Style with Easy DIY Patriotic Iron-On Patches!
Creating your own Fourth of July outfits with embroidered iron-on patches is a fun, no-sew way to show off your patriotic spirit. From classic flag tees to bold denim vests, patches add personality and flair without the hassle of sewing.
With the right supplies, simple application steps, and a bit of creativity, you can make memorable outfits that stand out at parades, barbecues, and fireworks shows, and keep them looking great year after year with proper care.
Ready to get started? Gather your patches, pick your favorite clothes, and start customizing your perfect July 4th look today!