


Iron on patches is excellent for expressing yourself or bringing back to life your old jacket, hat, shoes, pair of jeans, or any old clothes. But before you can unleash your creativity and create something colorful and unique, you need to know how to apply patches.
Applying embroidered patches is a simple process. Below you will find the step-by-step instructions for applying patches.

Patch Application Using Household Iron
- Prepare Your Fabric–Think about where you want to put your new patch before turning anything on. Check your clothing or fabric where the patch will be attached to ensure your fabric is not heat-sensitive, clean, and free of wrinkles. You will need a smooth, dry, clean fabric to apply patches.
- Set Your Iron Temperature–Find the right setting on your iron for your type of fabric (350 degrees is recommended). Preheat your iron to the right temperature setting (WITHOUT STEAM) and select a hard, flat pressing surface (not a padded ironing board).
- Iron The Area–Preheat the spot where you will put your new patch by pressing down for 20 seconds. This will help warm the area, making it more conducive to melting the patch onto the fabric.
- Position Patch on The Fabric–Place the patch over the heated area, and if your fabric is heat sensitive and has beads or sequins, cover your patch design with a thin pressing cloth or plain colored fabric.
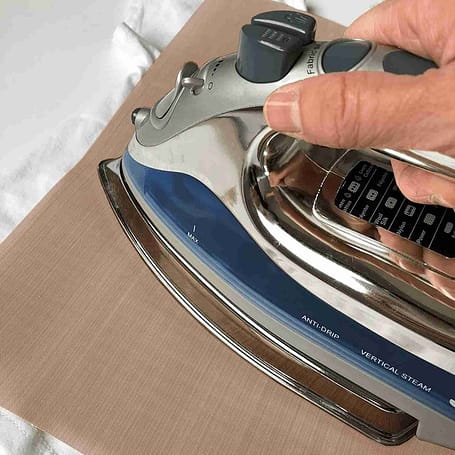
- Iron The Patch–Iron your patch. Press straight down for 30-40 seconds with constant pressure (NO BACK AND FORTH movement). Use a slow, circular motion. Then turn the garment inside out and repeat.
- If you have difficulty with adherence, you can increase heat, length of the press, and pressure.
- Check The Patch–Take off the cover and inspect the patch on the fabric. The fabric should stick to the material without turning up any ends. If not, put back the cover and repeat the process for another 30 seconds; don’t use a circular motion.
- Enjoy Your New Patch–Let it cool and test it out! Try it on when your fabric is at room temperature to see how well the patch holds.
Tips on Preparing to Iron the Patch
- Before ironing your patch on your cloth, keep in mind to check what material your fabric is made of. You can iron patches into cotton blends, denim, and wool. Cotton denim and polyester material blends are the best material. Fleece blankets can be ironed, but you need to use a pressing parchment or pressing cloth to cover the patch.
- Do not apply iron on patches on leather, rayon, nylon, velvet, acrylic, vinyl, waterproof fabrics, and other elastic and heat-sensitive fabrics.
- If you are unsure of your fabric’s material, test with an iron on a hem or hidden seam to see if the fabric will not get burned with heat.
- Take time to consider the placement of your patch. Arrange the patch into the placement that you want to see what it will look like before ironing the patch.
Tips on Ironing the Patch
- Pre-wash your item before applying patch.
- Place your fabric on a hard flat and heat-resistant surface. (not a padded ironing board)
- If the item your ironing onto is thicker like denim, or thick pajamas you may need to increase the ironing time so the heat gets through the thick material.
- Use a thin plain cloth or pressing sheet to cover the patch to protect the patch and fabric.
- Remove the iron and check the attachment of the patch. If the patch is not yet correctly attached, repeat the process until the patch is fully attached to the fabric.
- Consider sewing around the patch’s edges if you want a more secure patch attachment.
Care and Maintenance Tips
- We recommend turning your clothing inside out, washing it in cold water on delicate, and hanging it to dry to preserve the longevity of your decor.
- Do not wash in hot water or dry with heat; you may risk loosening the attached patch.
- If the patch becomes loose, you can try ironing, sewing, or using fabric glue to attach it again.
Summary
Iron-on patches have all kinds of uses. It is excellent for expressing yourself or bringing back to life your old jacket, hat, shoes, pair of jeans, or any old clothes. Applying embroidered patches is a simple process if you follow the instructions correctly. If you have questions, feel free to contact us.
 |
Patch Pressing Sheet 4″x6″
|
Patch Application Using A Fabric Glue
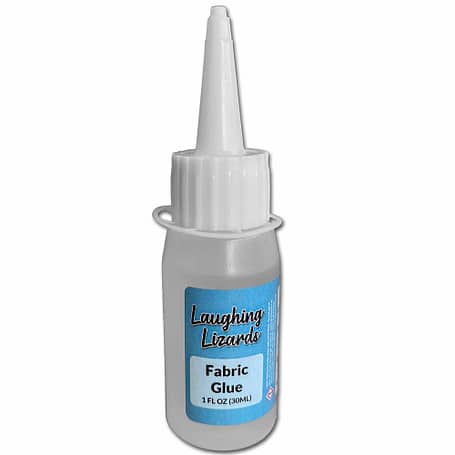 |
Fabric Glue – 1 ozDirections:
|
How To Apply Rhinestones Appliques Using a Household Iron
- Set iron into a cotton setting (WITHOUT STEAM) and select a hard flat pressing surface (not a padded ironing board). It is a good idea to iron your fabric before removing any wrinkles.
- Remove the white plastic backing and position the appliques on the garment.
- Carefully position your design and cover the design with a thin, pressing cloth or baking parchment paper.
- Press straight down for 45-50 seconds with constant pressure (not back & forth), then turn the garment inside and repeat the process.
- You will need to lift, reposition, and press the iron halfway through each press to ensure your iron steam holes are not above a stone, causing it not to receive the pressure it needs for adherence.
- Allow cooling thoroughly before slowly removing the clear plastic.
- If you see that some rhinestones didn’t stick as you peel the plastic off, carefully lay it back down in the same position, try a higher heat for a little longer, and make sure you are waiting until it is FULLY cooled down before peeling the plastic off.
Tips on Applying Iron on Patches
All our patches on the site (unless otherwise noted) come with a heat seal backing already applied. If the item you are putting on can not take the heat or is an odd shape and difficult to sew through, we recommend using a high-strength crafting glue to apply the patches. (You do not need to take off the heat seal backing on the patch when applying with glue.)
Also, if one or two rhinestones in a design are stubborn, we recommend using the high-strength crafting glue applied with a toothpick to the back of the rhinestone and, using tweezers, place it in the area of the design.

