
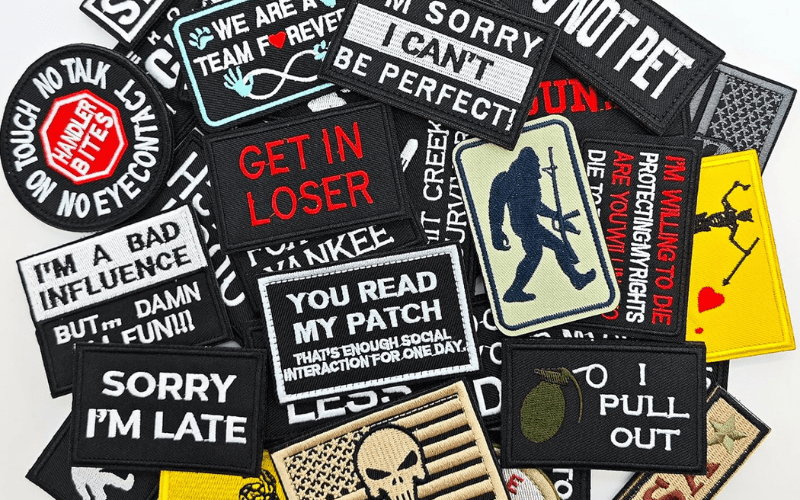
Guide to Hook and Loop Patches
Hoop and loop patches may seem like simple accessories at first glance, but delve deeper, and you'll uncover a world of versatility, functionality, and creativity. From military uniforms to fashion statements, from medical applications to DIY projects, these small yet mighty patches have found their way into countless aspects of our lives.
In this blog we will unravel everything you need to know about hoop and loop patches. Whether you're a seasoned enthusiast or just starting to explore their potential, this guide will equip you with the knowledge to understand, choose, customize, and utilize hoop and loop patches effectively.
With a hook backing patch and loop system, you can easily apply, remove and reapply this type of patch into your clothes, bags, hats, or any accessories. It is for this reason that hook and loop patches are used in the military, police, medical responders, teams, schools, businesses, and many more. A hook and loop patch can be made of different materials or styles, such as PVC patches, embroidered patches, and other types.

When these two pieces are pressed together, the hooks catch into the loops and create a temporary bond. Two separate these pieces; you just peel them apart. The attaching and removing process will not cause damage to the two fabrics, which allows for easy removing and attaching the patch many times.
Since its creation in the 1940s, the hook and loop patch has evolved a lot. Most patches are now created from durable synthetic fibers. This is because synthetic fibers help improve the longevity and usability of the patches. Nowadays, hook and loop patches are used mainly by the military, police, and firefighters. It is also widely used for decorating clothes, bags, jeans, shoes, greeting cards, and other DIY projects.

Hand sewing is a traditional and reliable method for attaching hoop and loop patches to garments, accessories, or other items. To hand sew a patch:
1. Thread a needle with a suitable thread color that matches the patch or garment.
2. Position the patch on the desired area of the fabric, ensuring it is centered and aligned correctly.
3. Use small, even stitches to sew around the edges of the patch, securing it to the fabric. Be sure to sew through both the patch and the fabric for a strong, secure attachment.
4. Continue sewing around the perimeter of the patch until it is securely attached. Knot the thread on the backside of the fabric to secure it, then trim any excess thread.
Hand sewing allows for precise control and customization, making it suitable for attaching patches to delicate fabrics or intricate designs.
1. Select a suitable sewing machine needle and thread that match the fabric and patch materials.
2. Position the fabric with the patch under the sewing machine presser foot, ensuring the patch is centered and aligned correctly.
3. Lower the presser foot and select a straight or zigzag stitch, depending on the desired finish and fabric type.
4. Sew around the edges of the patch using the chosen stitch, making sure to sew through both the patch and the fabric for a secure attachment.
5. Backstitch at the beginning and end of the stitching to reinforce the seams, then trim any loose threads.
Machine sewing is ideal for attaching patches quickly and efficiently, making it suitable for bulk production or industrial applications.
1. Clean the surface area where the patch will be attached, removing any dirt, dust, or debris that may interfere with adhesion.
2. Peel off the protective backing from the adhesive side of the patch to expose the sticky surface.
3. Position the patch on the desired area of the surface, pressing firmly to ensure good adhesion.
4. Apply pressure to the patch for several seconds to activate the adhesive and ensure a strong bond.
Adhesive application is quick and easy, making it suitable for temporary or non-sewing applications. However, adhesive-backed patches may not be as durable as sewn-on patches and may require reapplication over time.

1. Gently peel: Start by gently peeling one corner or edge of the patch away from the fabric or surface. Use your fingers to apply even pressure and gradually work your way around the perimeter of the patch, lifting it away slowly.
2. Use a flat tool: If the patch is firmly adhered or difficult to remove by hand, use a flat tool such as a credit card, spatula, or plastic knife to gently lift the edges of the patch. Slide the tool under the edge of the patch and slowly work it around to loosen the adhesive bond.
3. Apply heat: Heat can help soften the adhesive and make it easier to remove the patch. Use a hairdryer or heat gun on a low setting to warm the patch for a few seconds before attempting to peel it away. Be careful not to apply too much heat, as it can damage delicate fabrics or surfaces.
4. Use adhesive remover: If the patch leaves behind residue or adhesive after removal, apply a small amount of adhesive remover or rubbing alcohol to a clean cloth and gently rub the affected area. Allow the remover to penetrate the adhesive for a few minutes before wiping it away with a clean, damp cloth.
1. Regular Cleaning: Depending on the application, hook and loop patches can accumulate dirt, lint, or debris. Use a soft brush or a lint roller to remove surface contaminants regularly.
2. Spot Cleaning: For stains or localized dirt, use a damp cloth or sponge with mild soap to gently clean the affected area. Avoid soaking the patch excessively, as prolonged exposure to moisture can weaken the adhesive.
3. Air Drying: After cleaning, allow the patch to air dry completely before reattaching it. Avoid using heat sources like hairdryers or direct sunlight, as they can damage the patch and adhesive.
4. Velcro-Friendly Laundry Bags: If your hook and loop patches are on clothing items, use laundry bags to protect them during machine washing. This prevents the patches from getting entangled with other things or losing their adhesive properties.
This guide has equipped you with the knowledge to choose the perfect patch, attach it securely, and care for it properly. So, unleash your inner patch enthusiast, explore the world of designs and applications, and get ready to transform your everyday items into unique and personalized statements!
Remember, with a little creativity and the power of hoop and loop patches, you can add a touch of magic to anything you set your mind to. Happy patching!
In this blog we will unravel everything you need to know about hoop and loop patches. Whether you're a seasoned enthusiast or just starting to explore their potential, this guide will equip you with the knowledge to understand, choose, customize, and utilize hoop and loop patches effectively.
What is a Hook and Loop Patch?
A hook and loop patch is a type of patch that has a particular type of backing that allows you to stick to different surfaces easily. The front of the patch can have any design or custom design to suit your company, organization, or personal needs. For a hook and loop patch to stick, you need two different attachment sides. One side has tiny hooks, while the second has small loops to which the hooks can attach.With a hook backing patch and loop system, you can easily apply, remove and reapply this type of patch into your clothes, bags, hats, or any accessories. It is for this reason that hook and loop patches are used in the military, police, medical responders, teams, schools, businesses, and many more. A hook and loop patch can be made of different materials or styles, such as PVC patches, embroidered patches, and other types.
Advantages of using hook and loop patches:
Some advantages of hook and loop patches include:- Ease of Use: Hook and loop patches are user-friendly, making them accessible to people of all ages and abilities.
- Versatility: Hook and loop patches can be used in various applications, such as securing military badges, and creating custom patches for clothing and accessories.
- Reusability: Unlike many traditional closures, hook and loop patches with hook fastener patch can be fastened and unfastened repeatedly without losing their effectiveness.
- Adjustability: The strength of the bond can be adjusted by varying the density of the hooks and loops, allowing for tailored solutions in different contexts.
- Durability: When properly maintained, hook and loop patches can withstand significant wear and tear, making them long-lasting and cost-effective.
How do Hook and Loop Patches Work?
A hook and loop patch uses the exact mechanisms used in the Velcro technology. Every hook and loop patch has two different pieces of fabric which are sewn into your fabric or material. One fabric features tiny hooks, while the other pieces feature small loops.When these two pieces are pressed together, the hooks catch into the loops and create a temporary bond. Two separate these pieces; you just peel them apart. The attaching and removing process will not cause damage to the two fabrics, which allows for easy removing and attaching the patch many times.
Since its creation in the 1940s, the hook and loop patch has evolved a lot. Most patches are now created from durable synthetic fibers. This is because synthetic fibers help improve the longevity and usability of the patches. Nowadays, hook and loop patches are used mainly by the military, police, and firefighters. It is also widely used for decorating clothes, bags, jeans, shoes, greeting cards, and other DIY projects.
Common Uses of Hook and Loop Patches
A. Apparel and Fashion
- Patches on clothing and accessories: Hook and loop patches have made a notable mark in fashion. These patches are often used on jackets, backpacks, and jeans.
- Customization and personalization: Beyond ready-made patches, many fashion enthusiasts embrace the DIY spirit by creating their own custom patches. Hook and loop allow for the easy attachment and removal of patches, encouraging people to update and customize their clothing and accessories to reflect their evolving tastes and interests.
B. Tactical and Military Applications
- Identification and insignia patches: In the military and law enforcement world, hook and loop patches are indispensable. Soldiers and officers use these patches to display identification, rank, and unit insignia on their uniforms and gear.
- Equipment attachment: Tactical gear, such as vests, belts, and weapon holsters, often incorporates hook and loop patches to secure additional equipment. The versatility of hook and loop patches allows professionals to easily attach these patches to clothes or accessories.
C. Outdoor and Sports Gear
- Backpacks and outdoor clothing: Hook and loop patches have found a home in outdoor and adventure gear. Backpacks often feature patches for attaching gear, while outdoor clothing may include them for adjusting cuffs, securing hoods, or attaching name tags.
- Athletic gear and sneakers: Athletic gear, such as knee and elbow pads, often incorporate hook and loop closures instead of traditional laces, providing a convenient and customizable fit for athletes of all ages.
D. Medical and Healthcare
- Orthopedic supports and braces: Hook and loop patches are instrumental in the design of orthopedic supports and braces. Patients can easily adjust these devices, making them more comfortable and effective for rehabilitation or injury recovery.
- Fastening medical equipment: In healthcare settings, hook and loop patches are used to fasten various medical devices, from blood pressure cuffs to ECG electrodes. Their ease of use and reliability ensure that medical professionals can quickly and securely attach equipment to patients, thus improving the efficiency of healthcare procedures.
E. Industrial and DIY Applications
- Cable management: In industrial and tech environments, hook and loop patches are a go-to solution for cable management. They help organize and secure cables, preventing tangles and ensuring a tidy workspace.
- Securing objects in place: DIY enthusiasts and professionals alike appreciate the versatility of hook and loop patches for securing things. Whether it’s holding tools on a workbench, mounting components in a DIY project, or securing items in a vehicle, these patches’ reliable and adjustable nature simplifies the task.
How to Apply Hook And Loop Patches
A. Sewing method
1. Hand sewing:
Hand sewing is a traditional and reliable method for attaching hoop and loop patches to garments, accessories, or other items. To hand sew a patch:
1. Thread a needle with a suitable thread color that matches the patch or garment.
2. Position the patch on the desired area of the fabric, ensuring it is centered and aligned correctly.
3. Use small, even stitches to sew around the edges of the patch, securing it to the fabric. Be sure to sew through both the patch and the fabric for a strong, secure attachment.
4. Continue sewing around the perimeter of the patch until it is securely attached. Knot the thread on the backside of the fabric to secure it, then trim any excess thread.
Hand sewing allows for precise control and customization, making it suitable for attaching patches to delicate fabrics or intricate designs.
2. Machine sewing:
Machine sewing offers a faster and more efficient method for attaching hoop and loop patches, especially when working with larger quantities or thicker fabrics. To machine sew a patch:1. Select a suitable sewing machine needle and thread that match the fabric and patch materials.
2. Position the fabric with the patch under the sewing machine presser foot, ensuring the patch is centered and aligned correctly.
3. Lower the presser foot and select a straight or zigzag stitch, depending on the desired finish and fabric type.
4. Sew around the edges of the patch using the chosen stitch, making sure to sew through both the patch and the fabric for a secure attachment.
5. Backstitch at the beginning and end of the stitching to reinforce the seams, then trim any loose threads.
Machine sewing is ideal for attaching patches quickly and efficiently, making it suitable for bulk production or industrial applications.
3. Adhesive application:
Adhesive application offers a convenient and non-permanent method for attaching hoop and loop patches to various surfaces. To apply patches using adhesive:1. Clean the surface area where the patch will be attached, removing any dirt, dust, or debris that may interfere with adhesion.
2. Peel off the protective backing from the adhesive side of the patch to expose the sticky surface.
3. Position the patch on the desired area of the surface, pressing firmly to ensure good adhesion.
4. Apply pressure to the patch for several seconds to activate the adhesive and ensure a strong bond.
Adhesive application is quick and easy, making it suitable for temporary or non-sewing applications. However, adhesive-backed patches may not be as durable as sewn-on patches and may require reapplication over time.
How to Remove Hoop and Loop Patches
Here are some techniques for safe removal of your hook and loop patch.:1. Gently peel: Start by gently peeling one corner or edge of the patch away from the fabric or surface. Use your fingers to apply even pressure and gradually work your way around the perimeter of the patch, lifting it away slowly.
2. Use a flat tool: If the patch is firmly adhered or difficult to remove by hand, use a flat tool such as a credit card, spatula, or plastic knife to gently lift the edges of the patch. Slide the tool under the edge of the patch and slowly work it around to loosen the adhesive bond.
3. Apply heat: Heat can help soften the adhesive and make it easier to remove the patch. Use a hairdryer or heat gun on a low setting to warm the patch for a few seconds before attempting to peel it away. Be careful not to apply too much heat, as it can damage delicate fabrics or surfaces.
4. Use adhesive remover: If the patch leaves behind residue or adhesive after removal, apply a small amount of adhesive remover or rubbing alcohol to a clean cloth and gently rub the affected area. Allow the remover to penetrate the adhesive for a few minutes before wiping it away with a clean, damp cloth.
Proper Cleaning and Maintenance of Hook and Loop Patches
To ensure the longevity and effectiveness of your hook and loop patches, it’s essential to practice proper cleaning and maintenance:1. Regular Cleaning: Depending on the application, hook and loop patches can accumulate dirt, lint, or debris. Use a soft brush or a lint roller to remove surface contaminants regularly.
2. Spot Cleaning: For stains or localized dirt, use a damp cloth or sponge with mild soap to gently clean the affected area. Avoid soaking the patch excessively, as prolonged exposure to moisture can weaken the adhesive.
3. Air Drying: After cleaning, allow the patch to air dry completely before reattaching it. Avoid using heat sources like hairdryers or direct sunlight, as they can damage the patch and adhesive.
4. Velcro-Friendly Laundry Bags: If your hook and loop patches are on clothing items, use laundry bags to protect them during machine washing. This prevents the patches from getting entangled with other things or losing their adhesive properties.
Conclusion
Hoop and loop patches are more than just a passing trend; they're a versatile and fun way to personalize, identify, and express yourself. From adding a touch of whimsy to your backpack to proudly displaying your team spirit in your jacket, the possibilities are endless.This guide has equipped you with the knowledge to choose the perfect patch, attach it securely, and care for it properly. So, unleash your inner patch enthusiast, explore the world of designs and applications, and get ready to transform your everyday items into unique and personalized statements!
Remember, with a little creativity and the power of hoop and loop patches, you can add a touch of magic to anything you set your mind to. Happy patching!