
Embroidered Iron on Patches Frequently Asked Questions
Embroidered Iron-on patches are little bursts of personality you can add to almost anything! From jackets and jeans to backpacks and hats, these versatile little patches let you express your style, cover up a tear, or even create a unique piece. But with so many options and application methods out there, you might have a few questions before you unleash your inner designer (or mending master). Fear not, patch enthusiasts! This blog post is here to answer all your frequently asked questions about iron-on patches, from application techniques to washing and care. Let's dive in and get patching!

Necessary Tools and Equipment To successfully apply an iron on patch, you will need the following tools and equipment:


b. Cool Down: Allow the patch to cool completely after ironing. This helps the adhesive set and strengthens the bond.
c. Reinforcement: For additional security, consider sewing around the edges of the patch. This is especially useful for items that will be washed frequently or subjected to heavy use.

Basics of Embroidered Iron on Patches
1. What Embroidered Are Iron on Patches?
Embroidered Iron on patches are decorative or functional pieces of fabric that feature a heat-activated adhesive on one side. They are designed to be applied to fabric and other materials using the heat from an iron, which allows them to bond securely without the need for sewing. These patches can be used for a variety of purposes, including fashion embellishment, personal expression, and repairing damaged clothing.2. What Are the Types of Patches?
There are various types of iron on patches, such as:- Embroidered Patches: Featuring detailed designs stitched with thread, they are often used for uniforms and fashion.
- Printed Patches: Are made by printing images or patterns onto fabric, offering a wide range of colors and detailed graphics.
- Chenille Patches: Made with a tufted, plush material, commonly seen on varsity jackets.
- Applique Patches: Combine different fabric pieces to create a design, often used in quilting and decorative arts.
3. How Do You Tell if an Embroidered Patch Is Iron On?
Here’s how you can tell if an embroidered patch is iron-on:- Check the Backing: Examine the back of the patch. Iron-on patches typically have a smooth and slightly shiny surface, which is the adhesive side. You might notice a thin layer of glue or heat-activated adhesive that becomes tacky when heated.
- Look for instructions: Many iron-on patches come with instructions printed on the packaging or a separate insert. These instructions usually detail the steps for applying the patch using heat.
- Feel the Texture: Gently touch the back of the patch. If you feel a slightly sticky or tacky texture, it’s likely an iron-on patch. This adhesive activates when heat is applied and bonds the patch to the fabric.
- Perform a Heat Test: If you’re still unsure, you can perform a heat test on a small, inconspicuous area of the patch. Use a low heat setting on your iron and press it gently onto the patch for a few seconds. If the patch starts adhering, it’s iron on. If nothing happens, it might be another type of patch.
4. How Does Embroidered Iron on Patches Work?
The key to embroidered iron on patches is the heat-activated adhesive on their backside. When heated by an iron, this adhesive melts and penetrates the fibers of the fabric to which the patch is being applied. As the adhesive cools and solidifies, it forms a strong bond between the patch and the fabric, securing the patch in place. This process eliminates the need for sewing, making it quick and convenient.Necessary Tools and Equipment To successfully apply an iron on patch, you will need the following tools and equipment:
- Iron: A standard household iron with adjustable temperature settings. Some crafters prefer using a heat press for more precise temperature control, especially when applying multiple patches or working on large projects.
- Ironing Board: Provides a stable, heat-resistant surface to work on. Alternatively, a flat, hard surface covered with a heat-resistant cloth can also be used.
- Pressing Cloth: A thin, protective cloth (such as a piece of cotton or a clean dish towel) placed between the iron and the patch to prevent direct contact and protect both the patch and the fabric from heat damage.
- Clean Fabric Surface: Ensure the fabric you’re applying the patch to is clean and free from wrinkles, as dirt and creases can interfere with the adhesive bond.
5. Are Embroidered Iron on Patches Durable?
Embroidered iron-on patches are beautiful and durable. They are created to last for many years.6. How Long Will Embroidered Iron-on Patches Last on Clothes?
As several variables are involved, there is no timeframe for how long embroidered iron-on patches stay attached to clothes. Iron-on patches have strong glue, but the constant wearing and washing of clothes will cause the glue to lose its potency over time.
Patch Application Process
1. How Do You Apply Embroidered Iron on Patch?
Step-by-step instructions on applying embroidered iron on patches:- Prepare Your Materials: Gather your iron on patch, iron, ironing board, pressing cloth, and the fabric item to which you'll be applying the patch. Make sure the fabric is clean and free from wrinkles.
- Preheat the Iron: Set your iron to the appropriate temperature for the fabric you're working with. Typically, a medium to high heat setting is used, but avoid using steam.
- Position the Patch: Place the patch in the desired location on the fabric. Ensure it is correctly oriented and positioned.
- Cover with Pressing Cloth: Place a pressing cloth over the patch. This protects both the patch and the fabric from direct heat and prevents scorching.
- Iron the Patch: Press the iron down firmly onto the pressing cloth-covered patch. Hold it in place for 15–30 seconds, applying even pressure. Avoid moving the iron around to ensure the patch adheres evenly.
- Check Adherence: Lift the pressing cloth and check if the patch edges are securely adhered. If not, replace the cloth and iron again for another 10–15 seconds.
- Cool Down: Allow the patch to cool completely. This helps the adhesive set and ensures a stronger bond.
2. Can You Iron Embroidered Patches to Any Fabric?
Embroidered iron patches work best on fabrics that can withstand the heat of an iron and have a texture that allows the adhesive to bond effectively. Suitable fabrics include:- Cotton: Highly heat-tolerant and adhesive-friendly.
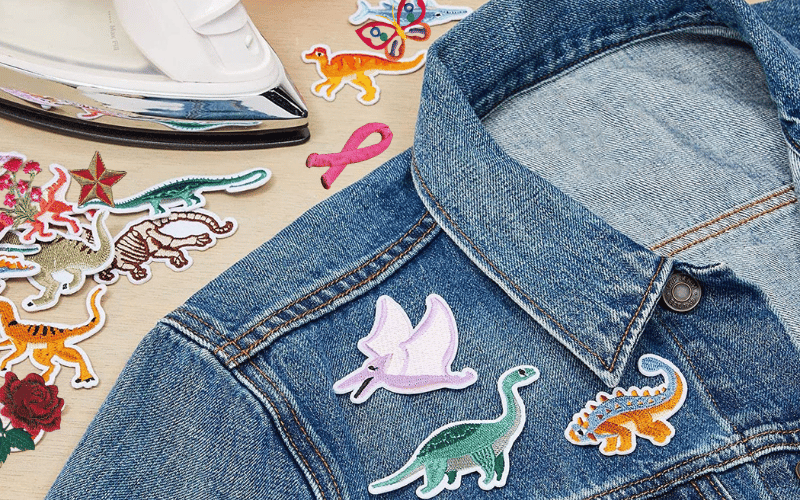
- Denim: Thick and durable, ideal for patches.
- Polyester: Often suitable, but lower heat settings may be necessary.
- Nylon: Prone to melting under high heat.
- Silk: Delicate and can scorch easily.
- Leather: The adhesive may not bond well, and heat can damage the material.
- Waterproof or Stretchy Fabrics: The adhesive may not hold, and heat can damage the fabric’s properties.
- Lower Heat Setting: Use a lower iron setting to prevent scorching or melting.
- Shorter Ironing Time: Apply heat in shorter bursts and check adherence frequently.
- Extra Protection: Use a thicker pressing cloth or even a sheet of parchment paper between the iron and the fabric to diffuse heat further.
- Alternative Methods: Consider using fabric glue or sew-on patches instead of iron on patches for very delicate materials.
3. What Setting Do You Need to Iron Embroidered Patches?
Preheat your iron to the highest heat setting suited to the material you are using, and position your patch where you want it on the material. Be careful with delicate fabrics, such as polyester, silk, or rayon, as some of these are not supposed to be ironed, and the material may not hold up to the patch.4. Can You Use a Steamer for Iron on Patches?
You do not use steam while ironing the patch. Once the iron is set to the highest setting, place a plain cloth or parchment paper on top of your patch. This protects the garment and the patch from being damaged by too much heat.Embroidered Iron on Patches Troubleshooting and Tips
1. What if the Patch Doesn't Stick Properly?
Common Issues and Solutions for Applying Patches:a. Insufficient Heat or Pressure:
- Issue: The iron was not hot enough, or pressure was not applied evenly.
- Solution: Increase the iron’s heat setting within safe limits for the fabric and apply more pressure. Ensure the iron is held steadily over the patch without moving it around.
b. Inadequate Ironing Time:
- Issue: The patch was not ironed long enough for the adhesive to melt and bond.
- Solution: Extend the ironing time, but do it in shorter increments (10–15 seconds) to avoid scorching the fabric.
c. Thick or Textured Fabric:
- Issue: The fabric's texture or thickness prevents proper adhesion.
- Solution: Apply heat for a longer duration and press more firmly. For very thick fabrics, consider using a heat press if available.
d. Improper Fabric Type:
- Issue: The fabric is not suitable for iron-on patches (e.g., nylon, silk, waterproof materials).
- Solution: Use fabric glue or switch to sew-on patches. If possible, use a lower heat setting and try again with a pressing cloth for delicate fabrics.
e. Dirty or Oily Surface:
- Issue: Dirt, oils, or other residues prevent the adhesive from sticking.
- Solution: Clean the fabric thoroughly before application. Wash and dry the item to ensure a clean surface.
2. How to Ensure the Patch Stays on for a Long Time?
a. Secure Edges: Pay extra attention to the edges of the patch. Ensure they are well-adhered to prevent peeling. Applying extra heat and pressure to the edges can help.b. Cool Down: Allow the patch to cool completely after ironing. This helps the adhesive set and strengthens the bond.
c. Reinforcement: For additional security, consider sewing around the edges of the patch. This is especially useful for items that will be washed frequently or subjected to heavy use.
3. Washing and Care Instructions for Embroidered Iron on Patches
- Wait Before Washing: Allow the patch to fully adhere and cure for at least 24 hours before washing.
- Turn Inside Out: Wash the garment inside out to reduce friction on the patch during the washing cycle.
- Gentle Cycle: Use a gentle wash cycle with cold or lukewarm water to minimize stress on the patch.
- Avoid Harsh Detergents: Use mild detergents and avoid bleach or strong chemicals that could weaken the adhesive.
- Air Dry: Whenever possible, air dry the garment instead of using a dryer. If using a dryer, opt for a low heat setting to prevent the patch from lifting or melting.
- Iron-on Touch-Ups: If edges start to peel after washing, reapply heat with an iron to re-secure the patch.
Purchasing and Sourcing Embroidered Iron on Patches
1. Where Can You Buy Embroidered Iron on Patches?
a. Online Stores
- Etsy: A marketplace for handmade and vintage items, Etsy offers a vast selection of unique and custom-made iron on patches. Many sellers offer the option to personalize patches with your own designs.
- Amazon: Amazon has a wide range of iron on patches, from simple shapes to elaborate designs. It’s a convenient option with fast shipping and customer reviews to help guide your purchase.
- eBay: A good source for both new and vintage patches. You can find individual patches or bulk lots at varying price points.
- Specialty Websites: Websites like Laughing Lizards specialize in custom and bulk orders, often catering to teams, organizations, and businesses.
b. Local Retailers
- Craft Stores: Chains like Michaels, Joann Fabrics, and Hobby Lobby stock a variety of iron on patches. These stores often carry seasonal and themed patches, as well as basic designs.
- Fabric Stores: Independent fabric stores typically offer a selection of patches, particularly those suited for clothing repairs and customization.
- Department Stores: Some department stores, especially those with a focus on fashion and home goods, may have a section for iron on patches in their craft or DIY sections.
- Thrift Stores and Flea Markets: These can be treasure troves for finding unique and vintage patches, often at a lower cost.
2. What Should You Look for When Buying Embroidered Iron on Patches?
- Adhesive Quality: The patch should have a strong, evenly applied adhesive on the back. Poor-quality adhesive can result in patches that peel off easily.
- Fabric Quality: High-quality patches are made from durable fabrics that withstand wear and washing. Look for patches made from materials like cotton, polyester, or denim.
- Stitching and Detail: For embroidered patches, check the quality of the stitching. The threads should be tightly woven without loose ends or fraying. The design should be clear and detailed.
- Colorfastness: The colors should be vibrant and not bleed or fade easily. This is particularly important for patches that will be frequently washed.
- Edge Finish: The edges of the patch should be neatly finished to prevent fraying. Merrowed edges (overlocked) are a sign of a high-quality patch.