
How to Design Your Own Custom Embroidered Iron-on Patch
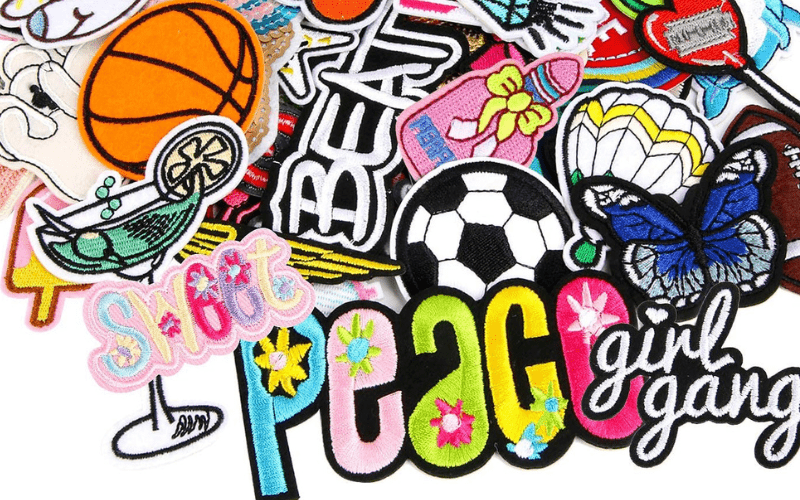
Custom embroidered iron-on patches are a fun and creative way to personalize clothing, accessories, and DIY projects. Whether designing a unique fashion statement, branding your business, or creating a one-of-a-kind gift, custom patches allow you to easily showcase your creativity. With the right design, materials, and application techniques, you can create a high-quality patch that stands out and lasts.
In this blog, we will walk you through the step-by-step process of designing your own custom embroidered iron on patch. From choosing the perfect design and materials to applying and maintaining it for long-lasting results. Whether you're a DIY enthusiast or a small business owner, this blog will help you create a patch that reflects your style and purpose.

Why Custom Embroidered Iron-On Patches Popular?
Custom patches have surged in popularity for several reasons:
1. Personalization & Self-Expression: Patches allow people to express their interests, beliefs, and creativity by adding unique designs to their clothing and accessories.
2. Branding & Business Promotion: Many businesses, clubs, and organizations use embroidered patches to enhance brand recognition and create a professional look.
3. Fashion & Streetwear Appeal: Custom patches have become a major trend in the fashion industry, seen on denim jackets, backpacks, and hats as statement pieces.
4. DIY Crafting & Custom Creations: Hobbyists and crafters love making their patches to sell, gift, or use in DIY projects.
Step 1: Planning Your Patch Design
Before you start creating your custom embroidered iron-on patch, it's important to plan your design carefully. A well-thought-out design ensures your patch looks great, stands out, and serves its intended purpose. Planning involves choosing the purpose of your patch, determining its shape and size, and selecting the best colors for embroidery.
a. Choosing a Purpose for Your Patch
Understanding the purpose of your patch will help you create a design that is visually appealing and functional. Here are some common uses for custom embroidered iron-on patches:
Personal Expression (Fashion, Accessories, DIY Projects)
- If you’re designing a patch for personal use, think about what represents your personality and style.
- You can create patches featuring your favorite symbols, quotes, or artwork to sew onto denim jackets, tote bags, or hats.
- DIY enthusiasts often design patches to enhance their handmade projects, making them unique and customized.
Branding and Business Logos
- Many businesses use custom embroidered patches to create a professional and recognizable brand identity.
- A well-designed logo patch can be added to uniforms, hats, or bags to promote your brand and create a sense of unity among employees.
- Small businesses and Etsy shop owners can create custom patches to sell as trendy accessories.
Club, Team, or Organization Patches
- Sports teams, school clubs, and organizations often use embroidered patches as part of their official attire.
- These patches create a sense of belonging and can be used on jackets, backpacks, or caps.
- Examples include scout troop patches, motorcycle club emblems, and school spirit patches.
Event or Commemorative Patches
- Custom patches make excellent souvenirs for special events, concerts, or conferences.
- They can be used to commemorate anniversaries, reunions, or achievements.
- Limited-edition patches are a popular way to mark a special occasion while offering a collectible item.
b. Deciding on the Shape and Size
The shape and size of your patch play a crucial role in how it looks and where it can be placed. Consider the following factors when choosing:
Common Shapes:
- Circle: A classic and balanced shape, often used for logos and emblems.
- Rectangle/Square: Great for name tags, brand patches, and text-heavy designs.
- Oval: A softer alternative to rectangles, often seen in vintage and traditional patch designs.
- Custom Shapes: Unique, die-cut shapes like animals, symbols, and objects can add personality and creativity to your patch.
Size Considerations Based on Placement:
- Jackets: Larger patches (3-6 inches) work well for back panels or chest placement.
- Hats & Caps: Small, compact patches (1-3 inches) fit better on the front or side.
- Backpacks & Bags: Medium-sized patches (2-4 inches) are ideal for visibility without overwhelming the item.
- Shirts & Uniforms: Rectangular name tag patches (1-2 inches high, 3-4 inches wide) are commonly used for professional branding.
c. Selecting Colors and Embroidery Details
Color selection is a key part of designing an eye-catching and readable patch. Here’s what to consider:
Choosing a Color Scheme That Stands Out:
- Use brand colors if making a patch for business or professional use.
- Use bold, high-contrast colors to make your patch noticeable.
- Consider complementary colors like blue and orange, red and green, for a strong visual impact.
Thread vs. Fabric Color Combinations:
- Ensure the embroidery thread contrasts well with the background fabric so that the design is clear.
- Light thread on dark fabric (e.g., white on black) and vice versa often create the best contrast.
- Consider using metallic, neon, or specialty threads for added visual interest.
Contrast for Visibility:
- Avoid using colors that are too similar (e.g., dark blue on black) as they may not be readable.
- If adding text, use bold fonts and high-contrast colors to improve legibility.
- Outlining elements with a darker or lighter color can help details stand out.
Step 2: Creating Your Patch Design
Now that you've planned the purpose, shape, and color scheme of your patch, it’s time to bring your design to life. This step covers design tools, best practices for embroidery-friendly artwork, and the importance of border stitching for a professional finish.
A. Using Design Software or Hand-Drawn Artwork
There are two primary ways to create your custom embroidered patch design:
- Using graphic design software for precision and scalability.
- Hand-drawing your design and converting it into a digital format for embroidery.
Recommended Graphic Design Tools
If you’re creating your design digitally, using vector-based software allows for clean, scalable artwork. Some great tools include:
- Adobe Illustrator – Best for professional vector design, allowing smooth lines and clean color separations.
- CorelDRAW – Another powerful vector tool with embroidery-friendly design features.
- Canva – A user-friendly option for beginners, though not vector-based. It works well for simple patch designs.
- Ink/Stitch (an Inkscape extension) – A free tool designed for embroidery-specific vector artwork.
Converting Hand-Drawn Art into a Digital Format
If you prefer sketching by hand:
- Draw your design using dark, bold lines for better clarity.
- Scan the artwork at a high resolution (300 DPI or higher).
- Use a program like Adobe Illustrator or Inkscape to trace and convert it into a vector file (SVG, AI, or EPS).
- Simplify intricate details to ensure embroidery machines can accurately stitch the design.
B. Ensuring Embroidery-Friendly Design Features
Embroidery is different from printed designs, it involves stitching thread onto fabric, so certain design choices improve the outcome. Here are some best practices:
1. Avoid Overly Complex Details
- Tiny details may get lost in embroidery; opt for bold, clear shapes.
- Fine lines, intricate textures, and small text may not translate well into stitches.
- Stick to simple graphics with distinct areas of color.
2. Use Thick Outlines for Clarity
- Outlining your design helps separate different colors and makes elements stand out.
- A thick outline (at least 2-3mm) improves definition, especially for small patches.
- Black or dark-colored outlines create contrast and prevent colors from blending together.
3. Choosing Bold Fonts for Text-Based Patches
- Avoid delicate or script fonts with thin strokes that may not stitch properly.
- Use blocky, sans-serif fonts like Arial Bold, Impact, or Futura for maximum readability.
- Maintain a minimum letter height of ¼ inch (6mm) for clear embroidery.
C. Adding Borders and Edge Stitching
A well-defined border is essential for both aesthetics and durability. There are two common types of borders used in embroidered patches:
1. Satin Stitch vs. Merrowed Edges
-
Satin Stitch Border:
- Created with a series of dense embroidery stitches.
- Best for patches with custom shapes or irregular edges.
- Provides a modern, sharp look and works well for smaller patches.
-
Merrowed Edge (Overlock Stitch):
- A thicker stitched border that wraps around the entire edge of the patch.
- Typically used for circular, square, or rectangular patches.
- Creates a classic, durable finish.
2. The Importance of a Clean Border for Durability
- A well-stitched border prevents fraying and gives the patch a polished, professional appearance.
- Ensuring a strong border helps the patch maintain its shape and structure, especially after multiple washes.
- If using an iron-on backing, the border helps seal the edges properly, reducing the risk of peeling.
Finalizing Your Patch Design
Once you’ve created your design, ensure it’s in a format suitable for embroidery. Most embroidery machines use DST, PES, or EXP files, so if you’re working with a manufacturer, ask them which file type they prefer. If designing for DIY embroidery, check if your embroidery software can convert your design into a stitchable format. With your design ready, the next step is choosing the right materials to bring your custom embroidered iron-on patch to life!

Step 3: Choosing the Materials for Your Patch
Selecting the right materials is crucial for creating a high-quality embroidered patch that is durable, visually appealing, and easy to apply. This step covers the fabric base, embroidery thread options, and different patch backing choices.
Fabric Base Options
The foundation of your patch is the fabric base, which affects the overall durability, texture, and appearance. Here are some common fabric choices:
1. Twill (Most Popular Choice)
Pros:
- Durable and holds embroidery stitches well.
- Provides a smooth surface for detailed embroidery.
- Comes in various colors, reducing the need for excessive background stitching.
Cons:
- It can be slightly stiff, making it less flexible for curved surfaces.
Best For: Standard embroidered patches used on jackets, uniforms, and backpacks.
2. Felt
Pros:
- Soft texture that adds a unique, handmade feel.
- Does not fray, so the edges don’t always need finishing.
- Works well for vintage-style patches or DIY hand-stitched embroidery.
Cons:
- Less durable compared to twill or denim.
- Can look fuzzy over time, especially with heavy wear.
Best For: DIY craft projects, vintage patches, and decorative indoor use.
3. Denim
Pros:
- Sturdy and highly durable, making it great for heavy-duty patches.
- Works well for rugged, textured designs.
- Provides a stylish, casual aesthetic, especially for jean jackets and bags.
Cons:
- Can be thick and harder to stitch through.
- Heavier than twill or felt, so it may not be suitable for delicate fabrics.
Best For: Workwear patches, jeans, or rugged fashion accessories.
Backing Options: Iron-On, Sew-On, or Velcro
The backing of your patch determines how it attaches to fabric. Choosing the right type ensures it stays secure and functional for its intended use.
1. Iron-On Backing (Most Convenient)
Pros:
- Quick and easy to apply, no sewing needed!
- Works well on flat, smooth surfaces like denim, cotton, and twill.
- Great for DIY enthusiasts or temporary patches.
Cons:
- May start peeling after multiple washes if not properly secured.
- Not suitable for stretchy or delicate fabrics like silk or activewear.
- Requires high heat for application, which can damage some materials.
Best For: Quick DIY projects, fashion patches, and non-stretchy fabrics.
Tip: For extra durability, stitch around the edges even if using iron-on backing to prevent peeling over time.
2. Sew-On Backing (Most Durable)
Pros:
- Offers long-term durability and won’t peel off over time.
- Works on almost any fabric, including delicate and stretchy materials.
- Ideal for high-movement areas like elbows, knees, or bags.
Cons:
- Requires sewing skills or a tailor.
- Takes more time to apply than iron-on patches.
Best For: Patches on uniforms, backpacks, workwear, or any item needing permanent attachment.
3. Velcro Backing (Removable & Versatile)
Pros:
- Easily removable and interchangeable.
- Used in military, tactical gear, and uniforms.
- Can be attached to Velcro-ready surfaces without additional sewing.
Cons:
- Requires a Velcro-compatible surface to attach.
- Can wear out over time with repeated use.
Best For: Tactical patches, event badges, and patches that need frequent removal or swapping.
How to Order Custom Patches:
- Start With The Basics: Determine your patch design, size, and how many patches you need. Then send us a request, and we can get started!
- Submit Your Design: Send us your artwork or get help from our free design service. We’ll make your ideas a reality in no time at all.
- Approve a Sample: After you place your order, we’ll send a photo sample for you to approve.
- Receive Your Patches: Get free shipping in the U.S. or select rush service if you’re in a hurry. All of our patches come backed with our 100% satisfaction guarantee.
Conclusion
Creating and caring for your custom embroidered iron-on patch is a rewarding experience that allows you to showcase your personality, promote your brand, or commemorate special events. By following the steps in this guide, you’ll have a high-quality, long-lasting accessory that’s as unique as you are.
Now it’s your turn! Start designing your custom embroidered patch today and give your wardrobe, gear, or brand a personal touch. Whether for fashion, marketing, or a DIY project, there’s no limit to the possibilities.
Ready to create your own patch? Check out our site. Happy patch-making!