
How to Decorate Hats with Patches
In today's fashion landscape, where trends evolve rapidly and individuality reigns supreme, hat customization has emerged as a prominent means of personal expression. Beyond mere utility, hats have become statement pieces that reflect the wearer's personality, interests, and beliefs. This evolution from basic headwear to personalized fashion staples underscores a broader cultural shift towards embracing uniqueness and creativity in everyday attire.
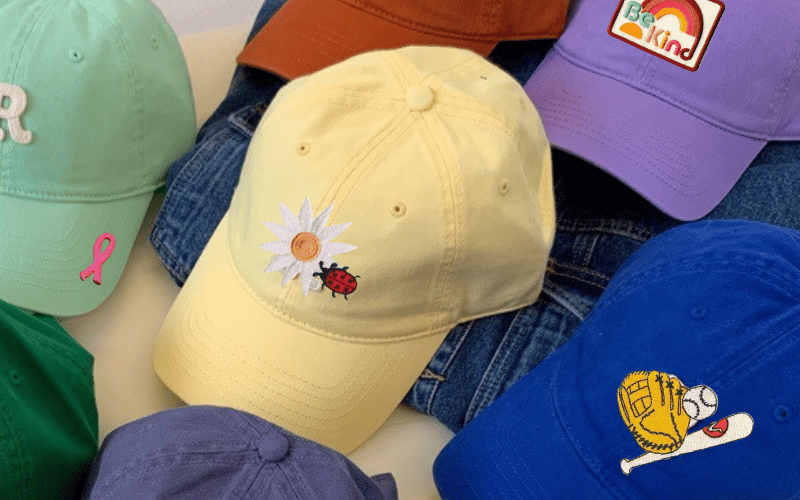
From classic baseball caps to cozy beanies and trendy bucket hats, the possibilities for customization are as diverse as your imagination. Each patch tells a story, whether it's a nostalgic nod to a favorite band, a statement of advocacy, or a showcase of artistic expression. Join us as we explore the art of hat decoration with patches and unlock not just the how-to's but also the endless possibilities for making your headwear truly your own.


Step-by-step instructions for preparation and application:

In the ever-evolving landscape of fashion, patch-decorated hats stand out as statements of individuality and creativity. Embrace the joy of crafting and wearing hats that are uniquely yours, and let each patch symbolize a piece of your journey through life. Happy crafting!
From classic baseball caps to cozy beanies and trendy bucket hats, the possibilities for customization are as diverse as your imagination. Each patch tells a story, whether it's a nostalgic nod to a favorite band, a statement of advocacy, or a showcase of artistic expression. Join us as we explore the art of hat decoration with patches and unlock not just the how-to's but also the endless possibilities for making your headwear truly your own.
Materials Needed for Decorating Hats With Patches
Before you embark on decorating your hat with patches, it's essential to gather the right materials. Here's a list of what you'll need:List of Materials Needed:
- Hats: Choose hats that suit your style and the type of patches you plan to use. Popular choices include baseball caps, beanies, bucket hats, and more.
- Patches: Select patches that resonate with your interests, hobbies, or aesthetic preferences. Consider the size, color, and design of patches that complement your chosen hats.
- Needle and Thread: Even if you plan to use iron-on patches, having a needle and thread is useful for securing patches firmly in place.
- Scissors: A good pair of sharp scissors will be needed to trim threads, cut out patches if necessary, or shape fabrics as you work.
- Fabric Glue (optional): If you prefer not to sew, fabric glue can be used to attach patches securely to your hat.
- Marker: These tools can help you mark where you want to place your patches before attaching them, ensuring precise placement.
A. Choosing the Right Hat
Selecting the right hat is crucial for successful patch decoration. Different hat styles offer unique opportunities for customization, and considerations such as fabric type and color compatibility with patches play significant roles in achieving a cohesive and visually appealing result.Hat Styles That are Suitable for Patch Decoration:
1. Baseball Caps:- Style: Classic and versatile, baseball caps typically have a structured front panel and a curved brim.
- Patch Placement: Patches are usually placed on the front panels, sides, or even on the brim itself.
- Fabric: Typically made from cotton twill or polyester blends, it provides a stable base for patches.
- Style: Cozy and snug, beanies are perfect for cooler weather and casual outfits.
- Patch Placement: Patches are often placed on the front cuff or sides of the beanie.
- Fabric: Wool or acrylic blends are common, offering warmth and a soft texture ideal for patch application.
- Style: Trendy and casual, bucket hats have a wide, downward-sloping brim all around.
- Patch Placement: Patches can be applied on the front, sides, or even the brim of the bucket hat.
- Fabric: Usually made from cotton or nylon, providing a lightweight and comfortable base for patches.
- Style: Trucker hats feature a mesh back and a solid front panel, often made from foam or structured fabric.
- Patch Placement: Patches are typically placed on the foam front panel, offering a large canvas for designs.
- Fabric: Front panels are usually foam-backed polyester or cotton, while the mesh back provides ventilation.
B. Selecting the Right Patches
Choosing the right patches is key to personalizing your hat effectively. Patches come in various types, each offering unique characteristics and methods of attachment. Here's the different patch types and tips for selecting patches that resonate with your personal interests, hobbies, or fashion preferences:Various Types of Patches Available:
1. Embroidered Patches:- Description: Embroidered patches are crafted with intricate designs stitched onto a fabric backing. They often feature detailed artwork, logos, or lettering.
- Attachment: Typically sewn onto the fabric of the hat using needle and thread.
- Advantages: Durable, with a textured appearance that adds depth and visual interest to your hat.
- Description: Iron-on patches have a heat-activated adhesive backing. They are easy to apply by using an iron or heat press.
- Attachment: Simply place the patch on the desired area of the hat, cover it with a cloth, and press with a hot iron to adhere.
- Advantages: Convenient and quick application method without the need for sewing.
- Description: Sew-on patches come with no adhesive backing and are designed to be attached using needles and thread.
- Attachment: Requires stitching around the edges or through the patch itself to secure it onto the hat.
- Advantages: Offers a secure and permanent attachment method, suitable for hats that may undergo frequent washing or wear.
- Description: Velcro patches feature a hook-and-loop fastening system, allowing patches to be easily attached and removed from Velcro-compatible surfaces.
- Attachment: Velcro patches come with both the hook and loop sides; one side is sewn onto the hat, while the patch adheres to it.
- Advantages: Versatile and interchangeable, allowing you to switch out patches depending on your mood or outfit
C. Placement and Design
The placement of patches on your hat plays a crucial role in defining its overall look and impact. Different hat styles offer various placement options, and understanding how to balance patch sizes and positioning is essential for achieving aesthetic appeal. Here are guidelines for patch placement on different hat styles and the importance of design considerations:
Guidelines for Patch Placement on Different Hat Styles
1. Baseball Caps:
- Front Panel: The front panel of a baseball cap is a popular spot for patches. Place patches centered on the front for maximum visibility.
- Side Panels: Consider placing smaller patches on the sides of the cap, slightly above the ear, for added interest without overwhelming the design.
2. Beanies:
- Front Cuff: Sew or iron patches onto the front cuff of the beanie, ensuring they are centered and visible when worn.
- Side Placement: For beanies with a slouchy fit, patches can also be placed on the sides near the temple area, adding a touch of personalization.
3. Bucket Hats:
- Front Brim: Patches can be centered on the front brim of the bucket hat, making them highly visible from the front.
- Side or Back: Consider placing patches on the sides or the back of the bucket hat for a balanced look, especially if the front brim already features a prominent design.
4. Trucker Hats:
- Front Foam Panel: Trucker hats typically have a large foam front panel, ideal for showcasing larger patches. Center patches on this panel for maximum impact.
- Mesh Back: Avoid placing patches on the mesh back as they may not adhere securely or may interfere with ventilation.
The Importance of Balancing Patch Sizes and Positioning for Aesthetic Appeal:
- Proportion: Choose patch sizes that complement the hat style and panel size. Larger patches can serve as focal points on hats with ample space, while smaller patches add detail without overwhelming the design.
- Symmetry and Balance: Aim for symmetry when placing patches, especially on hats with multiple panels or sections. Centered patches on front panels create a balanced look, while asymmetrical placement can add a dynamic touch if done intentionally.
- Consider Hat Features: Take into account hat features such as seams, brims, and folds when positioning patches. Ensure patches lie flat and do not interfere with the hat's functionality or comfort.
- Personalization: The positioning of patches should reflect your personal style and preferences. Experiment with different placements to find a configuration that resonates with you and enhances the overall aesthetic of your hat.
Preparation and Application
Preparing your hat and applying patches properly ensures a neat and durable customization. Whether you choose to sew, iron, or use adhesive, here are step-by-step instructions and techniques for each method:Step-by-step instructions for preparation and application:
Preparation:
1. Gather Materials:- Ensure you have your chosen hat, patches, needle and thread (if sewing), iron (if ironing), fabric adhesive (if using), scissors, and marker or chalk.
- Before applying patches, clean the surface of the hat to remove any dust, dirt, or oils that could interfere with adhesion. Use a lint roller or damp cloth to ensure a clean surface.
- Use a marker or chalk to lightly mark where you want to place your patches on the hat. This helps ensure accurate placement and symmetry.
Application Techniques:
1. Sewing Method:- Step 1: Thread the needle with thread that matches the color of your patch or hat.
- Step 2: Position the patch on the marked area of the hat.
- Step 3: Begin sewing from the inside of the hat, pushing the needle through the patch and hat fabric. Sew around the edges of the patch, creating small, even stitches.
- Step 4: Knot the thread securely on the inside of the hat once you've sewn all around the patch. Trim any excess thread.
- Step 1: Preheat your iron to the temperature recommended on the patch instructions (usually medium heat).
- Step 2: Position the patch on the desired area of the hat, adhesive side down.
- Step 3: Cover the patch with a thin cloth or parchment paper to protect it from direct heat.
- Step 4: Press the iron firmly over the patch and hold for the recommended time (usually 10–15 seconds).
- Step 5: Allow the hat to cool completely before checking the patch's adherence. If needed, repeat the ironing process.
- Step 1: Apply a thin layer of fabric glue to the back of the patch, following the adhesive's instructions.
- Step 2: Position the patch on the hat and press firmly to ensure it adheres securely.
- Step 3: Allow the adhesive to dry and cure completely, as per the manufacturer's instructions.
Care and Maintenance
Once you've decorated your hat with patches, it's important to care for it properly to ensure longevity and maintain its visual appeal. Here are tips for caring for your decorated hats, including washing, storing, and handling repairs or reapplications of patches:Tips for Maintaining the Quality of Decorated Hats:
1. Washing Guidelines:- Hand Washing: Whenever possible, hand wash your hat using mild detergent and lukewarm water. Gently scrub around the patches with a soft brush or cloth to remove any dirt or stains.
- Machine Washing: If your hat is machine washable, place it in a mesh laundry bag to protect patches and wash on a gentle cycle with similar colors.
- Avoid Hot Water: To prevent damage to patches and hat fabric, avoid hot water and opt for cold or lukewarm temperatures.
- Air Dry: Allow your hat to air dry naturally, away from direct sunlight. Shape the hat to its original form before drying to maintain its structure.
- Avoid Dryers: Avoid using clothes dryers, as heat can damage patches and cause the hat to shrink or lose shape.
- Flat Storage: Store your hat flat in a clean, dry place to prevent it from losing its shape. Avoid hanging hats for extended periods, as this can lead to distortion.
- Hat Boxes or Containers: Use hat boxes or containers with ample space to store hats when not in use. This protects them from dust and keeps them organized.
Conclusion
By transforming ordinary hats into personalized masterpieces, you have the opportunity to showcase your interests, passions, and creativity in a wearable form. As you embark on your hat decorating journey, remember to care for your creations with gentle washing, proper storage, and timely repairs. This ensures that your patch-decorated hats retain their quality and continue to be cherished accessories in your wardrobe.In the ever-evolving landscape of fashion, patch-decorated hats stand out as statements of individuality and creativity. Embrace the joy of crafting and wearing hats that are uniquely yours, and let each patch symbolize a piece of your journey through life. Happy crafting!